

Understanding EV Chargers
Electric Vehicle (EV) Chargers are crucial tools for any electric vehicle owner, providing the power to recharge EVs efficiently at home, work, or public locations. These devices convert electric current from your power source into a form that can be safely stored in an electric vehicle's battery. Chargers vary by speed, power delivery, and installation requirements, making it essential to choose the right one to meet your charging needs.
What EV Chargers do we offer at Pure Electric?
At Pure Electric, we specialise in providing advanced EV charging solutions tailored to diverse requirements. Here’s a closer look at the EV chargers we offer:
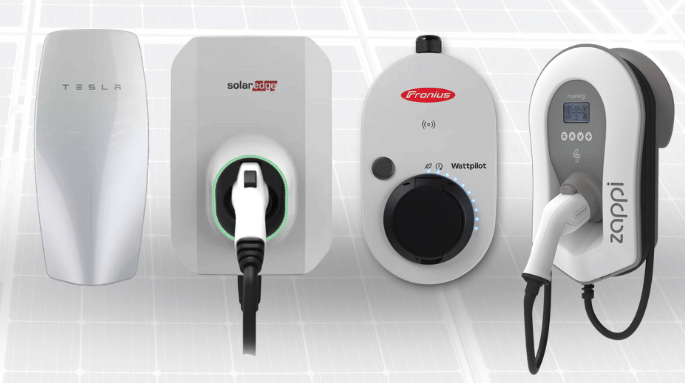
Zappi EV Chargers: A standout for its eco-friendly charging capabilities, the Zappi charger is designed with unique features that allow it to integrate with your home's renewable energy sources, like solar panels. Zappi offers a variety of charging modes, including eco and eco+ modes, which maximise the use of solar energy, potentially reducing or even eliminating grid electricity usage during charging.
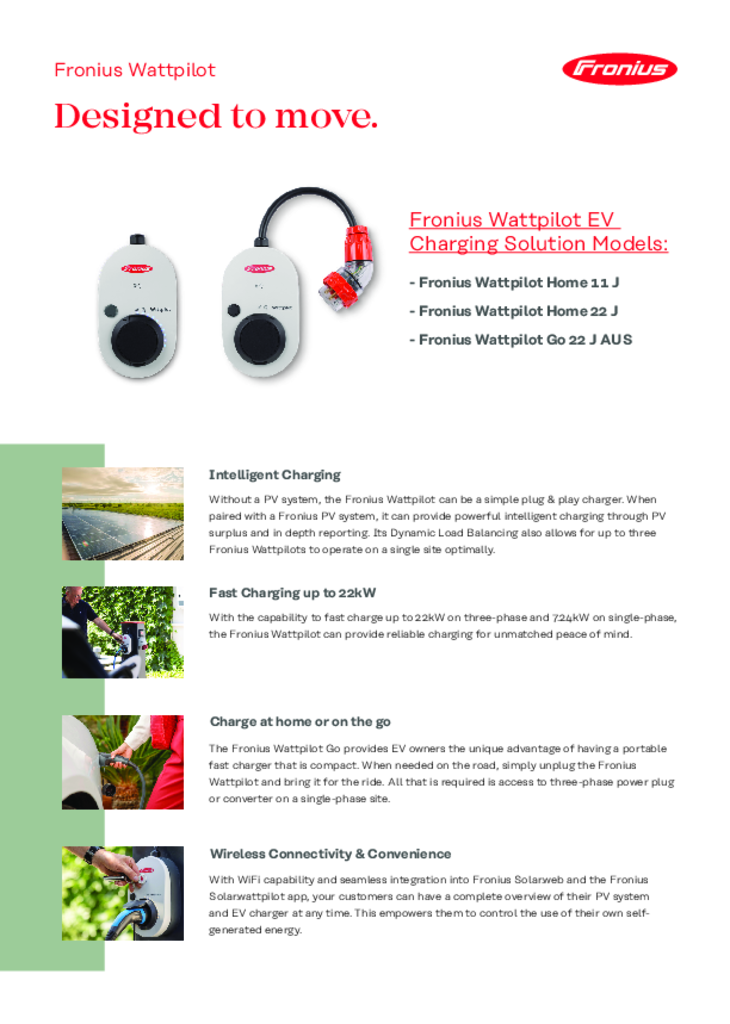
Fronius Wattpilot EV Charger: Known for its versatility, the Fronius Wattpilot can switch between being a fixed charging station and a mobile charger with ease. It supports up to 22 kW charging, facilitating rapid recharges. When integrated with energy management systems, the Fronius Wattpilot can optimise charging based on available power sources, prioritising solar energy while ensuring your vehicle is charged when you need it.
Tesla Wall Connector: Now part of our range, the Tesla Wall Connector offers high-speed, reliable charging for both Tesla and non-Tesla EVs with a Type 2 connector. It delivers up to 11 kW of charging power and supports smart features like Wi-Fi connectivity, remote monitoring via the Tesla app, and power sharing between multiple units, making it a great option for households with more than one EV. Its clean, durable design is suited for both indoor and outdoor installations.
How EV Chargers Work
EV chargers connect to the electric grid (and possibly to a home solar system) to draw power. They convert AC electricity from the grid into DC power suitable for charging an electric vehicle's battery. Chargers come with different ratings, expressed in kilowatts (kW), which determine how quickly they can charge an EV. Basic home chargers might offer around 7 kW of power, providing a good balance between charging speed and energy costs, while faster chargers can offer up to 22 kW or more for quicker charges.
Integration with Other Products
Integration plays a key role in maximising the efficiency and functionality of EV chargers, especially for systems designed to work with renewable energy sources:
Zappi Chargers integrate with home energy management systems to enhance their functionality. They can automatically switch to the most economical or ecological mode based on real-time energy production and consumption, optimising the use of renewable resources.
Fronius Wattpilot offers a high degree of flexibility through its compatibility with various home energy systems. It can be used independently or connected to a home’s solar PV system, providing smart charging options based on solar availability and energy pricing.
Tesla Wall Connector delivers fast, reliable charging with built-in Wi-Fi, remote monitoring through the Tesla app, and automatic software updates. When paired with a Tesla vehicle, smart features like Scheduled Departure can help time charging to coincide with solar generation or off-peak energy rates, supporting more efficient energy use at home.
How to Choose the Right EV Charger
Selecting the right EV charger is not just about keeping your electric vehicle powered up—it's about integrating a crucial component into your daily life and energy system. Understanding the types of EV chargers and how they fit into your daily usage and home energy system is crucial for making the most out of your investment in an electric vehicle.
Types of EV Chargers
Electric vehicle (EV) charging in Australia is classified into three main categories as defined by the Electric Vehicle Council:
Level 1 (AC) – Basic Home Charging
Level 2 (AC) – Fast Home & Workplace Charging
Level 3 (DC) – Ultra-Fast Public Charging
Each category differs in power output, charging speed, and application, catering to various residential, commercial, and public charging needs.
AC vs. DC Charging: Key Differences
AC (Alternating Current) charging is slower and commonly used for home and workplace charging points.
DC (Direct Current) charging is much faster, primarily found at public charging stations for rapid top-ups.
Level 1 (AC) – Basic Home Charging
Level 1 charging is the slowest method, with AC power outputs ranging from approximately 1.4kW to 2.8kW. Using the standard three-pin domestic power outlet (GPO), this type of charging is accessible through a portable cable that is often supplied with the vehicle. While this method is suitable for plug-in hybrid electric vehicles (PHEVs) with smaller batteries, battery-electric vehicles (BEVs) require significantly more time to fully charge. Typically, this method adds around 10 to 12 kilometres of driving range per hour. The main advantage of Level 1 charging is its portability, as it allows EV owners to charge from any standard power outlet.
Level 2 (AC) – Faster Home & Workplace Charging
Level 2 charging offers a dedicated AC charging solution that significantly improves charging speeds compared to Level 1. Power output ranges from 7kW for single-phase units up to 22kW for three-phase systems. A 7kW charger typically adds between 35 and 40 kilometres of range per hour, while a 22kW charger can provide between 50 and 130 kilometres per hour, depending on the EV. This type of charging is commonly installed in residential homes, workplaces, hotels, and resorts, where vehicles remain parked for extended periods. It allows most EVs to receive a full recharge overnight or gain enough charge for daily driving in just a few hours.
Most Level 2 chargers come equipped with a Type 2 connector, which is the standard for EVs in Australia. They are available as tethered units with a fixed cable or untethered models that support different plug types through a socket. In many cases, these chargers can also be integrated with rooftop solar systems, enabling users to maximise the use of self-generated renewable energy for cost-effective and sustainable charging.
Level 3 (DC) – Ultra-Fast Public Charging
Level 3 charging is the fastest option, using DC power to deliver rapid charging at power levels ranging from 25kW to 350kW. This high-speed charging technology can add between 150 and 300 kilometres of driving range per hour, with some high-end EVs able to reach 80% charge in just 10 to 15 minutes.
DC fast chargers are primarily found at public charging stations, including the Chargefox network, Australia’s largest EV charging provider. These stations are strategically located along highways and in urban centres to support long-distance travel and fast top-ups. Unlike AC chargers, Level 3 charging stations come with tethered cables, ensuring compatibility with most modern EVs. The most common plug types include CCS2 (Combined Charging System Type 2), which is the standard for most new EV models in Australia, and CHAdeMO, which is primarily used by certain Japanese EVs such as the Nissan LEAF.
Factors to Consider When Choosing an EV Charger
Integration with Home Energy Management Systems
For homeowners with a solar panel system or a smart home setup, choosing an EV charger that integrates with your existing system is beneficial. Smart chargers can be programmed to charge your car when solar energy production is at its peak or during off-peak electricity hours to minimise costs.
Charging Speed Needs
Consider how fast you need your vehicle to be charged. Daily commuters with long distances might prefer the speed of a Level 2 charger over the convenience of a Level 1 charger. Understanding your vehicle's charging capacity is also crucial as it determines how quickly your car can be charged regardless of the charger used.
Future Proofing
As the EV market evolves, choosing a charger that can accommodate future vehicles or increased charging needs is wise. Features like adjustable charging speeds or the capability to upgrade software are important for adapting to future innovations.
Installation Requirements and Professional Advice
Installation Site
Determine the most practical and accessible location for installing your EV charger. It should ideally be near where your vehicle is parked most frequently and where it can easily connect to your home's electrical system.
Electrical Capacity
Ensure your home’s electrical system can handle the additional load of an EV charger. In some cases, an upgrade or a new dedicated circuit may be needed, especially for Level 2 chargers.
Professional Installation
Due to the complexities of electrical systems and safety codes, professional installation by a certified electrician is recommended. This not only ensures safety and efficiency but may also be required to validate warranties and comply with local regulations.
Selecting the right EV charger is crucial for enhancing your electric vehicle experience. It involves understanding the types of chargers available, assessing your specific needs, and considering the integration with your home energy systems. At Pure Electric, we provide a range of EV charging solutions to meet diverse needs and preferences, ensuring you find the perfect match for your lifestyle and energy goals. With the right information and the right charger, you can ensure your electric vehicle is always powered efficiently and reliably.

RESOURCES
Check our RESOURCES
Fronius Wattpilot FAQ Flyer
More Details
Fronius Wattpilot Brochure
More Details
Myenergi Zappi v2.1 Operation and Installation Manual Rev 2.1.9 Dec 2022
More Details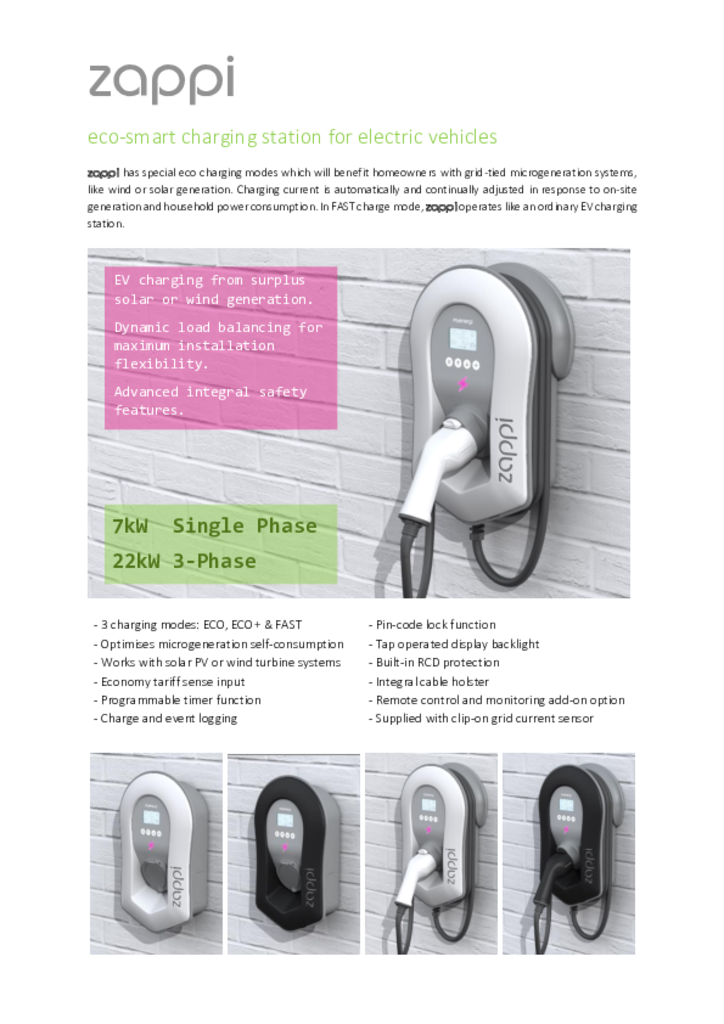
Zappi v2 EV Charger Datasheet
More Details
Tesla Wall Connector Gen 3 Installation Manual – AU NZ
More DetailsF.A.Q
Frequently Asked Questions
-
How to set up monitoring for my Fronius Wattpilot EV charger?
The Fronius Solar.wattpilot app can be used to start up, configure, operate, visualise and update the Wattpilot. The app is available for Android™ and iOS®.
Download The Fronius Solar.wattpilot app is available on the following platforms.
You can access the Wattpilot via the app as follows:
Launching the app
- Open the Fronius Solar.wattpilot app on the end device and follow the Setup wizard.
- Read and accept the terms of use
- Click on "Connect"
NOTE: Access for the Fronius Solar.wattpilot app must be allowed for end devices with an iOS operating system.
iOS settings > Privacy > Local network > Fronius Solar.wattpilot > Allow access to local networkSetting up a hot spot
The Wattpilot permanently opens a hot spot
- Scan the QR code on the reset card or connecdt the end device to the WLAN hot spot. The passowrd is located on the reset card of the Wattpilot.
- Follow the further instructions in the app.
NOTE: The selected WLAN of the Wattpilot must remain connected despite the absence of an Internet connection for end devices with an Android operating system.
Setting up the WLAN
- Select WLAN and enter the password
- Follow the further instuctions in the app.
NOTE: It can take up to 1 minute to establish the connection! If the signal strength is low, a WLAN repeater must be installed, for example.
Adding a Wattpilot
New or connected Wattpilot devices can be added in the Fronius Solar.wattpilot app.
- Click on the "+" symbol
- Click on the "Add" for the connected Wattpilot
- Follow the further instructions in the app
-
What are the Status Error Codes and Remedy for my Fronius Wattpilot EV Charger?
Status codes and remedy on Fronius Wattpilot EV Charger
Due to phase, voltage and switching function checks of the Fronius Wattpilot, a charging operation may be rejected.
The status codes are displayed via the LED status indicator (see LED status indicator on page 17) directly on the Wattpilot and in the app under "Status".
Status Codes
Issue Cause Remedy 1
Fault current detected (LEDs light up pink, the LEDs at the top flash red)
The residual current device has detected an error. The charging equipment in the vehicle may be defective. Have the charging equipment checked by a specialist. Disconnect and reconnect the charging cable. 3
At least one phase of the power supply is missing (the LEDs light up blue, the LEDs at the top flash red)
The device is only being supplied with 2 phases. Make sure that phase 2 and phase 3 are connected correctly. Option: a supply via phase 1 only is possible. 8
Grounding fault detected (the LEDs light up green and yellow, the LEDs at the top flash red)
Grounding fault detected. Check that the connection is properly grounded. 10
Relay fault detected
The relay has not switched. Disconnect the power supply to the device for 5 seconds. 11
Backup power mode detected
53 Hz mains current detected. Observe the instructions in the Operating Instructions. 12
Type 2 plug locking failed
The plug locking system does not work. Remove possible foreign parts in the plug housing. Type 2 plug not fully inserted. Insert the type 2 plug into the device as far as it will go until you hear a click. 13
Type 2 plug unlocking failed
The electric vehicle is plugged in. Unplug the electric vehicle. "Always locked" under "Cable release" in the Solar.wattpilot app is activated. Deactivate "Always locked" under "Cable release" in the Solar.wattpilot app. Release jammed. Insert the type 2 plug into the device as far as it will go until you hear a click. If the problem has still not been fixed: Press the push button on the device. If the problem has still not been fixed: Activate and save "Always locked" in the Solar.wattpilot app, then activate and save "Standard mode" under "Cable release". 100
Internal communication error (all LEDs flash red)
Device is not sending data. Disconnect and reconnect device. Perform a firmware update. Return device. 101
Temperature too high (the LEDs light up yellow, the LEDs at the top flash red)
Continuous load. Disconnect device and allow to cool down. Incorrectly installed cables. Disconnect device and allow to cool down. 105
No data available on the flexible electricity tariff (first or second LED - Eco Mode or Next Trip Mode - flashes red)
Flexible electricity tariff cannot be called up. Check WLAN and Internet connection. Wait until the server is available again. 109
No connection to the inverter (first or second LED - Eco Mode or Next Trip Mode - flashes red)
The connection to the inverter cannot be established. Check the network settings. Check the settings of the inverter. 114
For Eco Mode, PV surplus or flexible electricity tariff must be activated (Eco Mode LED flashes orange)
Eco Mode is selected and the "Use PV surplus" and "Use Lumina Strom / aWattar" settings are disabled. Activate the setting "Use PV surplus" and/or "Use Lumina Strom / aWattar". Change the mode. "Use Lumina Strom / aWattar" is enabled and there is no data connection to the Internet. Cached price data is still available. Check the network settings. 115
The set amount of energy cannot be reached in the specified time (second LED - Next Trip Mode - flashes orange)
The specified time is not sufficient for the desired amount of energy. Extend the specified time for charging. Reduce the desired amount of energy. 116
Update of flexible electricity tariffs failed (first or second LED - Eco Mode or Next Trip Mode - flashes orange)
The connection cannot be established. Check the network settings. The charging operation cannot be started, but all LEDs show the ready colour (default blue).
The vehicle is not being detected. Check vehicle cable and fit of charging plugs No LEDs light up after plugging in.
No power on the junction box. Check the overload fuse of the connection. Miniature fuse defective. Check the miniature fuse on the rear of the device. If it has melted, the power connection may not be installed properly. Check the polarity of the power connection before starting another test with a new miniature fuse. Use original miniature fuses only. The brightness of the LEDs has been set to 0. Increase the brightness of the LEDs in the Fronius Solar.wattpilot app. "Switch off LEDs after 10 s in standby" has been enabled. Deactivate "Switch off LEDs after 10 s in standby" or press the push button on the Wattpilot. -
Myenergi Hub how to change the channel? Zappi EV Charger not pairing
If your Zappi EV charger is not pairing with the Myenrgi Hub - a possibility is 'channel' on the Myenergi Hub does not match the channel on the Zappi EV Charger.
The remedy to try is to change the channel on your Myenergi Hub so it matches your Zappi EV Charger. Typically by default your Zappi EV Charger channel will be set to Channel 1 (A).
To change the Myenergi Hub Channel firstly:
Put Hub into Pairing mode
To put the hub into pairing mode, briefly press the left-hand button (Pair / Channel)
The Power LED will flash red and one of the other LEDs will be lit to indicate which channel the hub is using. The channel number is written under the LED.
Next how to Change the channel
While the hub is in pairing mode (Power LED flashing red), press and hold the left-hand button. The channel LED will cycle through the channels – Blue for channels 1-4 and White for channels 5-8
-
Tesla mobile app - log in / set up / learn more
Once your Powerwall has been turned on, download the Tesla app and start monitoring your Powerwall and home energy usage.
Step 1: Log In
Log in using the same email address you used to order Powerwall with solar. If you are already a Tesla vehicle owner, log in using the same email address you use to sign into your Tesla Account.Step 2: Set Up Notifications
Receive notifications when Powerwall starts backing up your home during instances such as a power outage.Step 3: You are now logged into the Tesla app
Learn more about the features of the Tesla mobile app. You can also learn more about using and customizing your Powerwall below: